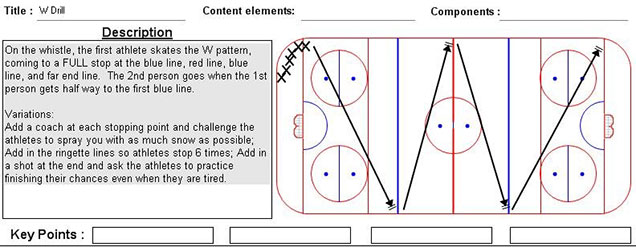
Your first job is to train your body to get into your most balanced and powerful position. Too many athletes lack speed and power because they aren’t as low and balanced as they could be. Being powerful is hard work so you have to train your body right.
The two most important elements of being a powerful, agile skater are: You must be 1) LOW to the ice and 2) you must be BALANCED. When you get lower and more balanced, you automatically become quicker, more powerful, and more efficient in everything you do during a ringette game.
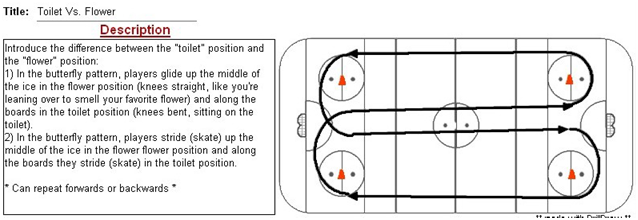
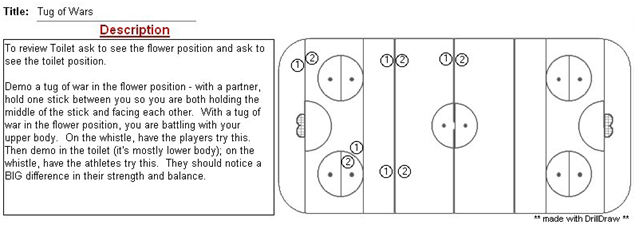
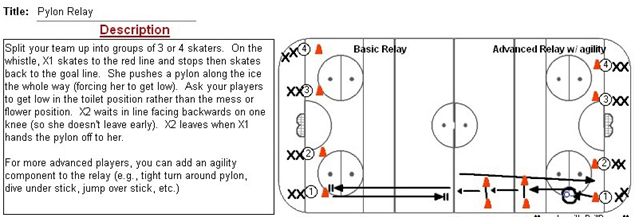
Our visual for this low and balanced position is called the ‘toilet position’ – it is the basic stance where power comes from being bent at the knees, not at the waist. (Kids love scattalogical humour, and they giggle when they imagine themselves sitting on the toilet in their skates).
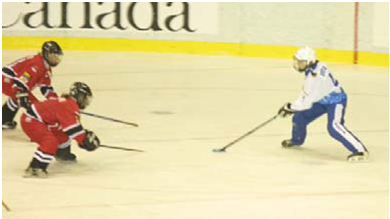
Figure 1: The “toilet position” in the defensive triangle allows these defenders to be agile and powerful, with their sticks low to the ice to take away passing lanes.
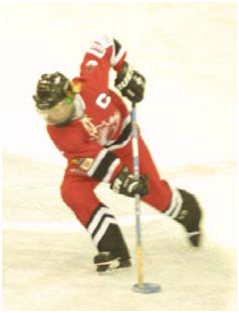
Figure 2: Being bent at the knees and not at the waist allows ringette players to turn quickly without falling or losing speed.
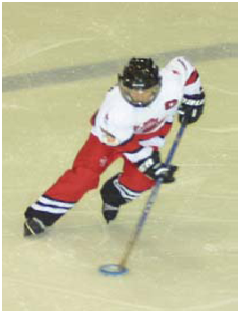
Figure 3: Being bent at the knees allows ringette athletes to use a full stride for speed and power. The opposite of being low and balanced is being “upright” and off balance. We often call this position the “flower” position because the athlete looks like she is bending over to smell the roses!
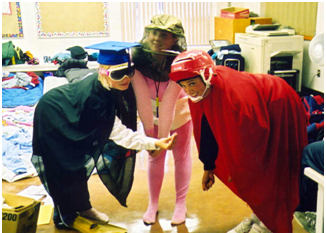
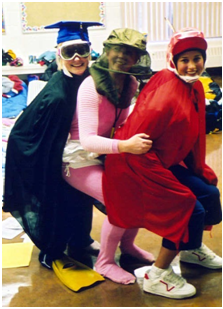
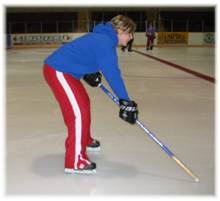
Ringette instructors (during costume day) demonstrate the “flower position” – bent at the waist.
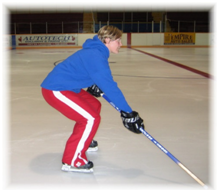
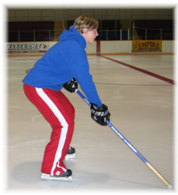
Now they demonstrate the “toilet” position, bent at the knees.
For more advanced athletes, a 3rd option is a position somewhere in between that we call “making a mess” because you are not quite on the toilet. The player is bending her knees, but not quite as low as the toilet position. Most athletes think they are in the toilet position but they are actually in the mess position. Here’s why.
At your next practice, stand face to face with a teammate about a stick length apart. On the count of three, get into the toilet position and try to hold it for two minutes. You do this with a teammate so you can watch how your bodies move as your legs become tired.
What you’ll probably find is that your bum slowly moves higher to relieve some of the pain you start to feel in your legs (this would be the “mess” position). You may also notice that your head gets lower – not because your knees are bending more but because you start to bend at your waist (this would be the “flower” position). Again, this is because your legs will start to feel tired and your body will look for ways to make it easier. This small but noticeable change makes a huge difference in agility and power. You must feel uncomfortable and a little off balance at first to become an efficient and powerful skater.
-
- Toilet position
-
- “Making a mess”
-
- Flower position
It may sound like a contradiction, but the key to teaching your athletes to get lower and more balanced is to have them feel what puts them off balance. Having a discussion about these positions is crucial. Ask your athletes to describe how it feels in both positions (legs, toes, back, etc.). Have your athletes perform various skating exercises in the “flower” position and in the “toilet” position.
How To Master The Basic Stance
Progression #1 – Standing
Your first job, as we mentioned above, is to crouch in the toilet position. Force yourself to hold it until your legs burn. When your legs get tired you will start to stand up a little. Do this exercise with your eyes closed this time and pay very close attention to how your body changes when your legs start to get tired. You have to know exactly what the toilet, mess, and flower positions feel like if you want to be able to force yourself into the toilet position when it matters most – with two minutes left in a tied playoff game when your coach asks you to go score the winning goal even when you’re tired!
This clip shows an athlete moving from the toilet position to the flower position.
As you practice moving between toilet and mess, pay attention to your toes. You should notice that in the toilet position, you can wiggle your toes freely. In the mess position, you start to lean forward (bend at the waist) and your toes start to crunch because the weight is coming off of your bum/legs and onto your toes. (You can use this tool in practice to perfect your basic stance and skating stride. At any given time, you should be able to wiggle your toes freely.)
Coaches, especially with beginners, you’ll have to review more than their bent knees. Make sure all parts of your athletes’ bodies are in an effective position. For example, check whether their head is up, looking at the play, or down, looking at the ice. Are they gripping their stick correctly? Are their knees close together / touching or can your athletes get at least one glove width between their knees?
For each of these parts of the powerful stance, have your athletes try it both ways. So, for example, while your athletes are standing in the toilet position, tell them to hold it for 30 seconds with their knees touching then ask them to hold it for 30 seconds while they pass their glove between their knees. Ditto for head down, looking at the ice versus head up, watching the play (you could ask them how many fingers you are holding up to make sure they’re in the right position).
For their knees, have them stand or glide with their knees touching, then have them do it while swinging a glove through their knees to ensure there is enough space between them:
The key for each element of the basic stance is showing or demonstrating each awareness exercise rather than just describing it.
Progression #2 – Gliding
Skate to the blue line and purposely glide in the “mess” or flower position. Notice exactly how your body feels. Now do it in the toilet position and notice the difference.
Progression #3 – Striding
Now, skate or glide in the flower, mess, and toilet positions.
In these progressions you are training your body to get as low as possible by bending at the knees. The reason you practice all the different positions is because you probably think you are really low and bent at the knees but don’t realize that you can get even lower. If you can get that extra one inch, you will get dramatically faster.
There is a small minority of players who cannot really bend into the toilet position because their skates do not fit properly, and they do not have enough flexibility in their skates to manage the toilet position.
There are usually two remedies to this problem: 1) getting the player’s blade re-aligned on their skate, and 2) having the athlete tie her skates differently (skip the third hole when tying the skates). If you suspect this is happening to your players most skate stores will do a free skate fit analysis for you.
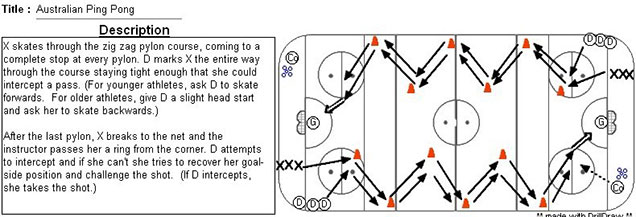
Drills & Games to Practice the Toilet Position
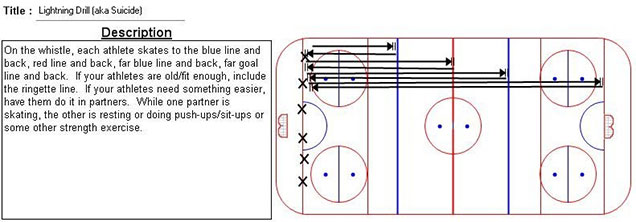
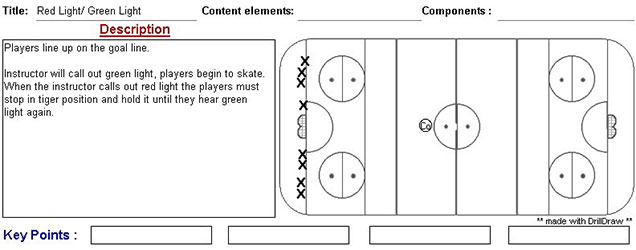
Once you’ve mastered the Toilet position, starting and stopping is much, much easier and will come naturally as you practice both. I recommend you working on the skill of stopping first. Here’s what to do:
If you’re a younger athlete, start with the Snow Plow stop. When gliding in the Toilet position, simply turn your heels outward while putting your toes together. You will naturally stop.
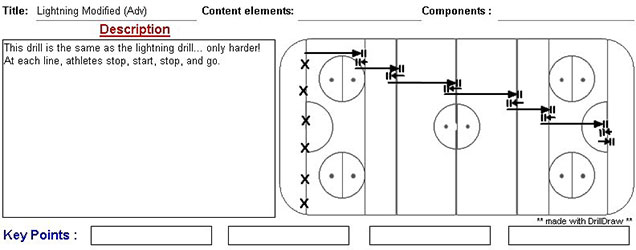
If you’re an older, more advanced skater, while gliding in the Toilet position,
simply turn left or right. You will naturally stop.
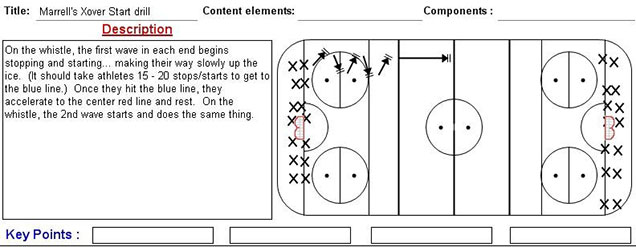
Drills to Practice Stopping and Starting